
For Nolting Quilting Machines
Merge Quilt Blocks

In the Design & Create Menu Select Pattern. Once in Pattern Cad main screen you need to select a pattern from our Block Library to work with.
I have selected the design Four Star Petal from our Block Library.

You will note that the design has a centre start position. You need to move the start point from the centre to the outer edge.
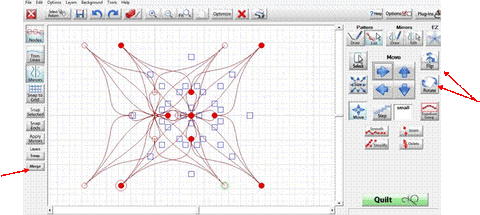
Simply select nodes to make them active.
Select the single node, by using your stylus to draw a box around it.
New Start Position

You only want the one solid node. Select - Move Start Point from the Tools drop down menu.
This is now the new start position for the design.


Once the start point is in this position, make a copy of our block – from the file menu bar at the top of your screen, select - File – Layers – Copy to Bottom Layer.
You now have two copies of the design – one on top of each other.
Next you need to Flip and Rotate the design to put the start point on the Left. In the edit screen on the right - Select ALL – Edit – Flip – Flip Horizontal.
This now gives you a start point on the left side.
Now you need both of the designs on the active level. On the left of your screen select the Merge Icon – The 2 designs are now there one on top of the other. You need to move them so that the designs are side by side and the start points are touching.

It is easier to see what you are doing if you turn nodes off – upper left of the screen. You now need to optimize the design to take out the jump stitches and to make sure that you are connecting the end point to the new start point of the other design.

Select the nodes Icon at the top left of the screen, then select Optimize

Tap Remove All – now the software will ask us do you wish to connect the first and last points? Normally you would say no but in this instant you need to say YES.
Simply follow the steps above to create a border.

Happy designing.